
🛠️ Tools #010 - SQL 04 - DDL deep dive, Views & Indexes
CREATE, ALTER, RENAME, TRUNCATE & DROP

Hello folks,
Welcome back to Tools, Without any delay let’s get to the meat and potatoes of this edition. In case you missed the previous edition, here you go -

Today we will explore deeply the different type of command types. Let’s start with -
DDL (Data Definition Language)
DDL statements are used to manage the structure of the database. Last time we saw how to use CREATE for database and tables. Today we will explore the rest of the DDL functions starting with -
ALTER function
It is used to modify existing database objects.
Last time we created a table called “employees” in database called “TWF_TOOLS_SQL”. Let’s add a project id to our already existing table.
ALTER TABLE employees
ADD COLUMN project_id INT;
This SQL statement will add a new column named "project_id" to the "employees" table with a datatype of INT. You can adjust the datatype according to your requirements, depending on how you plan to use the "project_id" column.
After running the above code if you will do a SELECT * FROM employees you will see the new project_id column with blanks, we will later fill some data in it.

RENAME function
The RENAME COLUMN clause in the ALTER TABLE statement is used to change the name of an existing column in a database table.
This operation does not change the data stored in the column; it simply updates the metadata to reflect the new column name.
Let’s try to change the name of project_id to assigned_project_id -
ALTER TABLE employees
RENAME COLUMN project_id TO assigned_project_id;
& just like last time you will see the changes appear in the table -

To try out the next functions we will need to save a copy of our existing table. We do that using the following query -
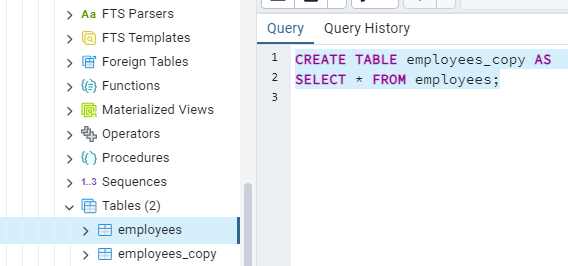
CREATE TABLE employees_copy AS
SELECT * FROM employees;
This query will create a table called ”employees_copy” which will be a copy of existing “employees” table. You can check if the new table was created or no, by either doing a query on the new table or checking in the schemas folder -
TRUNCATE function
Truncate is a command used in SQL to remove all the rows from a table. It's kind of like wiping a whiteboard clean; all the data is gone, but the structure of the table remains intact.
Truncate is usually faster than deleting rows one by one using the DELETE command (A DML function) because it doesn't log individual row deletions.
Once you truncate a table, the data is gone for good. So, it's important to be careful when using truncate, especially on production databases.

Let’s truncate the duplicate table “employees_copy” we created in the last step -
TRUNCATE TABLE employees_copy;
& here is how the resulting table will look like -

DROP function
The DROP statement in SQL is used to delete an existing database object, such as a table, index, view, or even a database itself. (Just after this we will talk about index and views)
Like truncate, drop is an irreversible operation. Once you drop an object, it's gone for good. So, it's crucial to be absolutely certain that you want to delete the object before executing the drop command.
Syntax - The syntax for dropping different types of objects varies slightly, but the basic structure is:
DROP OBJECT_TYPE object_name;Replace
OBJECT_TYPEwith the type of object you want to drop (e.g. TABLE, INDEX, VIEW, etc.), andobject_namewith the name of the object you want to delete.
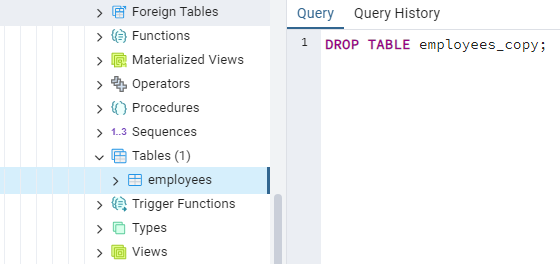
As “employees_copy” is an empty table now, we can use DROP to delete this table.
DROP TABLE employees_copy;
& there goes the table -
Indexes
Indexes are like the table of contents in a book—they help you quickly locate information within a database table.
An index is a data structure that improves the speed of data retrieval operations on a database table at the cost of additional storage space and decreased performance for data modification operations (such as INSERT, UPDATE, and DELETE).
Key Benefits:
Faster Data Retrieval: Indexes allow the database engine to locate specific rows quickly, reducing the time it takes to execute queries.
Improved Performance: Queries that leverage indexes can perform significantly faster, especially when dealing with large datasets.
Enhanced Data Integrity: Unique indexes ensure data integrity by enforcing uniqueness constraints on columns or sets of columns.
Types of Indexes:
Primary Indexes: Unique identifiers for each row in a table.
Unique Indexes: Enforce uniqueness constraints on one or more columns.
Composite Indexes: Combine multiple columns to create a single index.
Let’s use our beloved “employees” table to understand indexes now -
Before that let’s see the syntax for creating indexes -
The syntax for creating an index in SQL varies slightly depending on the database management system (DBMS) you're using, but the basic structure is similar across most systems. Here's a general outline of the syntax for creating indexes:
CREATE INDEX index_name
ON table_name (column1, column2, ...);
Let's break down each component of the syntax:
CREATE INDEX: This is the SQL statement used to create an index.
index_name: This is the name you give to the index. It should be unique within the database and should follow the naming conventions for identifiers in your DBMS (e.g., no spaces, special characters, etc.).
ON table_name: This specifies the name of the table on which you want to create the index.
(column1, column2, ...): This specifies the column or columns on which you want to create the index. You can create indexes on single columns or on combinations of multiple columns (composite indexes).
Next, let's create an index on the "email" column to improve the performance of queries that filter employees by email:
CREATE INDEX idx_email ON employees ("email");
With this index in place, queries that filter employees by email will execute faster because the database engine can quickly locate the relevant rows without having to scan the entire table.
For example, to find all employees with email = “john.doe@example.com , you can execute the following query:
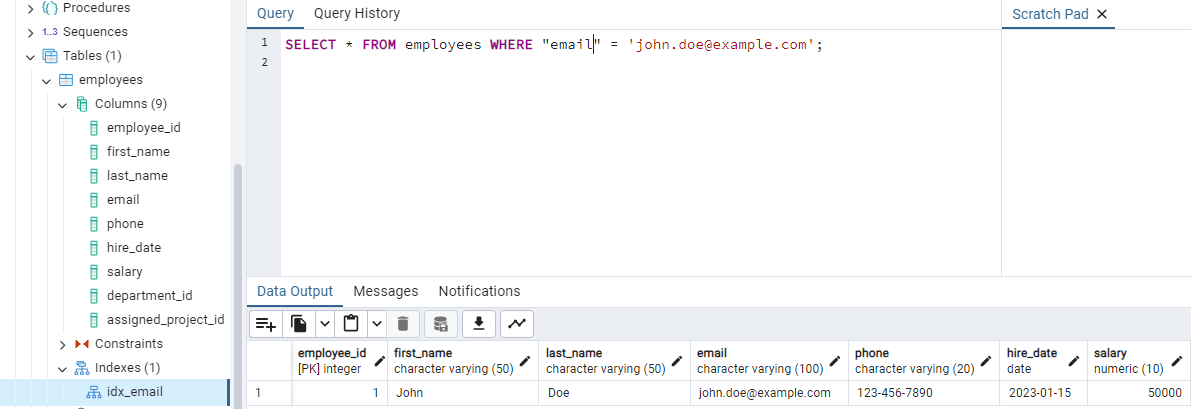
You can notice on the left panel we also see the newly created index.
Indexes are essential for optimizing query performance, especially in tables with large datasets. By carefully choosing which columns to index and understanding how indexes work, you can significantly enhance the efficiency of your database operations.
Views
Views are virtual tables that present data from one or more underlying tables in a structured format. Think of views as customizable windows into your data—they allow you to simplify complex queries, restrict access to sensitive information, and provide a consistent interface for data analysis.
Key Benefits:
Data Abstraction: Views abstract underlying table structures, making it easier to work with complex data models.
Security: Views enable you to control access to sensitive data by restricting the columns and rows visible to users.
Simplified Queries: Views allow you to encapsulate frequently used queries, reducing redundancy and improving maintainability.
Types of Views:
Simple Views: Derived from a single base table.
Complex Views: Derived from multiple base tables or other views, potentially involving joins and aggregations.
Materialized Views: Physical copies of query results stored as tables, providing faster access to precomputed data.
Let’s go back to employees data to build views -
Creating a view in SQL involves defining a virtual table based on the result set of a SELECT query. Views can simplify complex queries, encapsulate logic, and provide a consistent interface for data access. Let's create a view for the "employees" table:
Suppose you want to create a view that includes only the "employee_id" and "department_id" columns from the "employees" table. Here's how you can create such a view:
CREATE VIEW employee_info AS
SELECT employee_id, department_id
FROM employees;
Here’s the result -
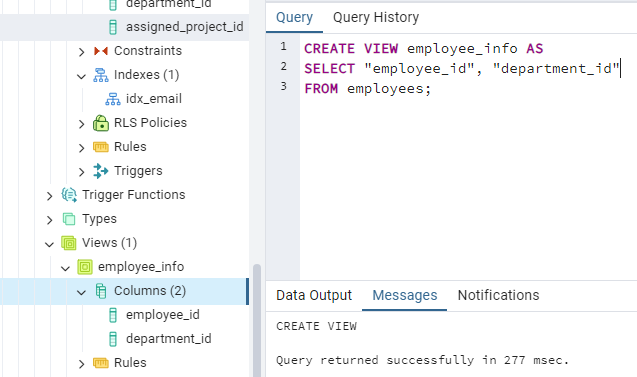
You can notice on the left panel we also see the newly created view and it’s columns.
Now, you can query the "employee_info" view as if it were a regular table. For example:
SELECT * FROM employee_info;
This query will retrieve the "name" and "department" columns from the "employee_info" view.
Keep in mind that views are virtual tables and do not store data themselves; they simply provide a way to access data from underlying tables. Any changes made to the underlying tables (e.g., adding or removing columns, updating data) will be reflected in the view.
That’s all for today!
Put your questions in the comments below.
Until next edition,
Raghunandan 🎯
& If it’s your first time here, TheWeekendFreelancer currently has 5 ongoing series - Tools 🛠️, Maths 📈, Domain 🌐, Trends 📻 & My Notes 📝. Have fun reading!
P.S. - “The Weekend Freelancer” is a reader backed publication. Share this newsletter with your friends and relatives & consider becoming a free or paid member of this newsletter. Every subscription gives me an extra ounce of motivation to keep going 💪!
You can also support my work here. Cheers!