
🛠️ Tools #009 - SQL 03 -SQL Command types
DDL, DQL, DML, DCL, TCL & Creating our first Database & table

Hope everyone is doing well this week.
Today we will understand the different command types in SQL & also start building our first SQL database.
Understanding SQL commands empowers users to interact with databases effectively, whether it's querying data, defining database structures, manipulating records, managing transactions, or controlling access rights.
Understanding SQL Command types

DDL (Data Definition Language) commands enable users to define and manage the structure of database objects.
CREATE: Creates new database objects such as tables, indexes, or views (we will talk about the difference between these in upcoming editions)
Example:
CREATE TABLE employees (id INT, name VARCHAR(50), age INT);
ALTER: Modifies existing database objects.
Example:
ALTER TABLE employees ADD COLUMN salary DECIMAL(10,2);
DROP: Deletes database objects like tables, indexes, or views.
Example:
DROP TABLE customers;
TRUNCATE: Deletes all records from a table but keeps the table structure intact.
Example:
TRUNCATE TABLE orders;
DQL (Data Query Language) commands are vital for retrieving data from databases.
The SELECT statement is particularly versatile, allowing users to filter, aggregate, and sort data according to their requirements.
Example:
SELECT * FROM table_name
DML (Data Manipulation Language) commands facilitate the manipulation of data within tables.
INSERT: Adds new records to a table.
Example:
INSERT INTO employees (name, age) VALUES ('John', 30);
UPDATE: Modifies existing records in a table based on specified criteria.
Example:
UPDATE employees SET age = 31 WHERE name = 'John';
DELETE: Removes records from a table based on specified criteria.
Example:
DELETE FROM employees WHERE age > 60;
MERGE: Performs insert, update, or delete operations based on a specified condition.
Example:
MERGE INTO target_table USING source_table ON condition WHEN MATCHED THEN UPDATE SET column1 = value WHEN NOT MATCHED THEN INSERT (column1, column2) VALUES (value1, value2);
TCL (Transaction Control Language) commands manage the transactions within a database, ensuring data consistency and integrity.
COMMIT: Saves all changes made during the current transaction.
ROLLBACK: Reverts the database to its previous state before the transaction began.
SAVEPOINT: Sets a point within a transaction to which you can later roll back.
DCL (Data Control Language) commands grant or revoke permissions to database objects, ensuring data security and integrity.
GRANT: Provides specific users with privileges to database objects.
Example:
GRANT SELECT ON employees TO user1;
REVOKE: Withdraws privileges granted with the GRANT command.
Example:
REVOKE INSERT, UPDATE ON employees FROM user1;
Creating an SQL database
Let’s get started with the hands on part then!
I am using PostgreSQL server Management Studio called pgAdmin4. Your can download this free tool from here -
In the first SQL edition I shared a few choices for DBMS you can chose from -

So here is how the interface of pgAdmin4 will appear once you will install it for the first time -
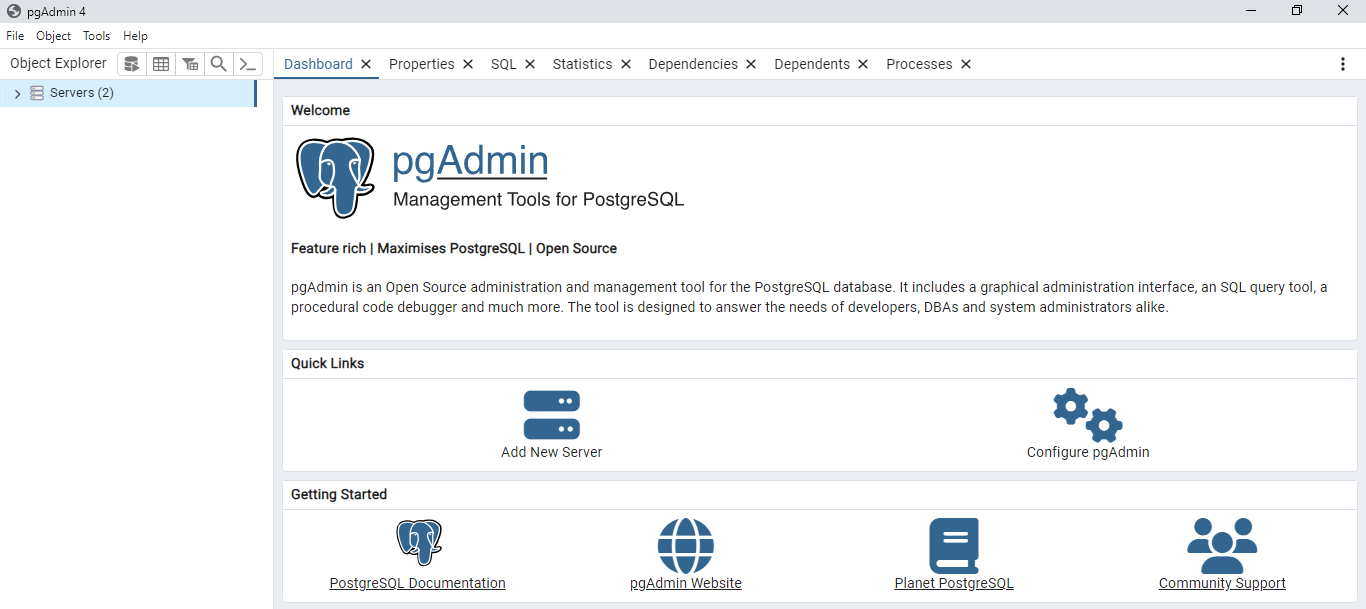
By default you will be able to see a database called “postgres”

To create a new database, right click on Databases and then Create and finally Database. A window will pop up where you can name the new database as you wish & click Save. The rest of the options we will talk about in later editions.

An interesting thing to look would be the SQL code behind this operation -
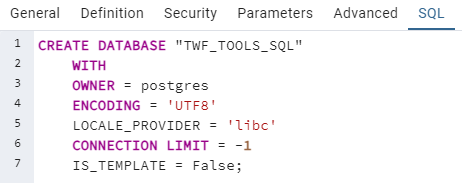
Let’s breakdown the elements of this query -
CREATE DATABASE : This command is used to specify the name of the database we wish to create.
WITH : This clause indicates that you're providing options for creating the database.
OWNER = postgres : This specifies the owner of the database. In this case, it's set to "postgres", which is typically the default superuser in PostgreSQL.
ENCODING = 'UTF8’ : This sets the character encoding for the database to UTF-8, which is commonly used for storing multilingual text as it supports a wide range of characters.
LOCALE_PROVIDER = 'libc': This specifies the locale provider for the database. In this case, it's set to 'libc', which is the default locale provider for most PostgreSQL installations.
The locale determines how data such as dates, times, and currency is formatted.
CONNECTION LIMIT = -1: This sets the maximum number of connections allowed to the database.
A value of -1 means there is no connection limit, allowing an unlimited number of connections.
IS_TEMPLATE = False : This specifies whether the database can be used as a template for creating new databases.
Setting it to False means the database cannot be used as a template.
Let’s create a sample table now in this database -
To start with select the drop down section “Schemas” from the newly created database and then right click on Tables, then Create and finally Table -

We are going to create a table called “employees” which will have following columns -
employee_id, first_name, last_name, email, phone, hire_date, salary, department_id
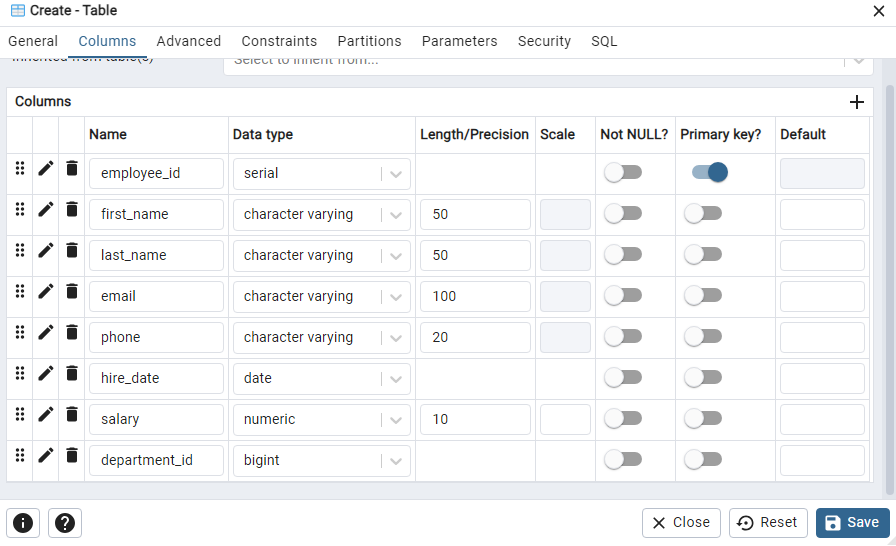
Each column and its datatype will be defined in this next step. postgres also allows you to define the length as well as define whether NULL values are acceptable or no.
We can also define which column we wish to use Primary key (unique value for each row of the table).
In PostgreSQL, the SERIAL data type is not a standalone data type like integer or text. Instead, it is a shorthand or syntactic shortcut for creating an auto-incrementing integer column.
When you define a column as SERIAL, PostgreSQL implicitly creates a sequence object and sets the default value of the column to be populated by the next value of that sequence. This is commonly used for primary key columns to ensure each row has a unique identifier, typically increasing by 1 for each new row inserted.
Here is an equivalent SQL code -

& we have our first table in the database!
Now let’s complete today’s exercise by filling this table with some sample data.
Use the Query tool option by right clicking on the table name -

We will use the following query -

You can use F5 to run the script & Query History tab shows you all the previously run queries as well as their success status. If your query ran successfully you can check your data by running
SELECT * FROM employees
and you should have a table output that looks something like this -

If you don't see the data output window then use the reset layout button on top right of your query window.
Congratulations! you just created your first database with table!
This is just the beginning, next week we will start digging in deeper into different command types on real life datasets.
If you face any issues with installing or in creation of database or table, put your doubts in the comments below & I will be happy to help you.
Until next edition,
Raghunandan 🎯
& If it’s your first time here, TheWeekendFreelancer currently has 5 ongoing series - Tools 🛠️, Maths 📈, Domain 🌐, Trends 📻 & My Notes 📝. Have fun reading!
P.S. - “The Weekend Freelancer” is a reader backed publication. Share this newsletter with your friends and relatives & consider becoming a free or paid member of this newsletter. Every subscription gives me an extra ounce of motivation to keep going 💪!
You can also support my work here. Cheers!